Control Panel
The stock control panel had been replaced with a custom panel. Fortunately I managed to source an original panel complete with looms from Yahoo Japan. The panel is in nice condition overall.

I gave the overlay a clean using baby wipes and magic eraser, which was really good for removing small stubborn marks. However there were some small rust spots around the overlay, particularly at the front on the part which slides in to the control box.
To treat the rust I first masked off the overlay, and then I applied rust remover gel. Once the rust had been removed I used appliance touch-up paint on the metal spots.
I used the following:
1. Masking tape
2. Powder free blue nitrile medical examination gloves
3. Hammerite rust remover gel and brush
4. Hammerite radiator touch-up paint.
Sticks and Buttons
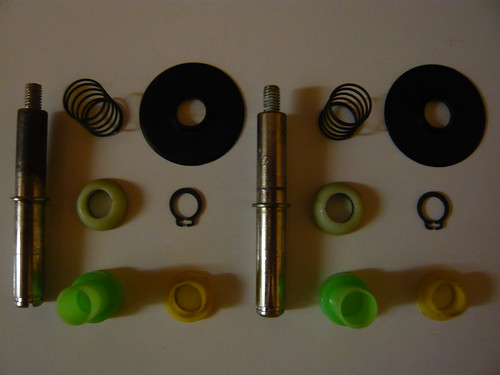
The stock sticks are Seimitsu LS-32. I’ve replaced the parts subject to wear and tear. The only tool required for disassembly is a pair of circlip pliers. First I removed the circlip. Then I removed the plastic parts, the spring and the shaft. After giving the internal part of the stick a good clean, I fitted the new parts and fixed them in place with the circlip.
The LS-32 refresh kit, and the parts they replaced.

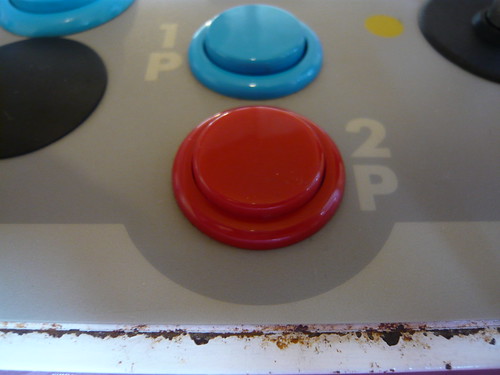
I’ve fitted new buttons and ball tops, returning them to original stock colours.
| P1 Ball Top Handle | Seimitsu LB-35 | Blue | x1 |
| P2 Ball Top Handle | Seimitsu LB-35 | Red | x1 |
| P1 Start | Seimitsu PS-14-D | Black rim/blue button | x1 |
| P2 Start | Seimitsu PS-14-D | Black rim/red button | x1 |
| CP1 | Seimitsu PS-14-G | Black rim/blue button | x6 |
| CP2 | Seimitsu PS-14-G | Black rim/red button | x6 |


No comments:
Post a Comment