It’s totally tubular!
About The Cab
I remember seeing Toobin’ many years ago down Great Yarmouth seafront, but I don’t recall ever playing it until PLAY Expo Blackpool 2016. The cab stood out from the crowd, with unique controls, colourful graphics, cool artwork and an awesome cascading waterfall marquee. The idea of the game was so cool and original: paddle down the river and avoid the hazards, which include branches, hungry alligators, submarines, dinosaurs whipping their tails, and punks throwing cans at you! The game was loads of fun, and I loved the cab design.
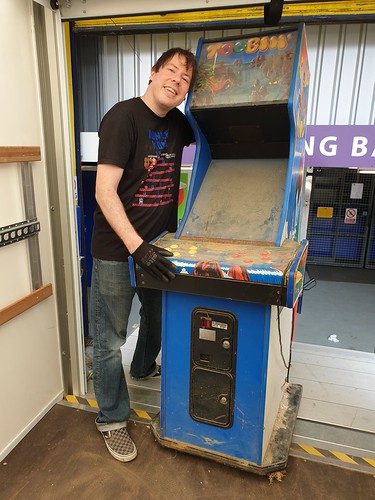
My next encounter with Toobin’ was during an Op visit. I had some idea of what cabs he had, but this one was a complete surprise. I couldn’t help but show my excitement when I saw it, breaking one of the Raid rules. In fact I just wanted to hug it.
The cab had been stored in a polytunnel for a few decades, presumably after it broke and was removed from his arcade. It would have suffered from years of temperature cycles and clearly needed a lot of love. It was pretty filthy, covered in grime and bird poo, but looked structurally sound. The Op spoke fondly of the game. He had a lot of nostalgia for his games, some of which he seemed very attached to and didn’t want to part with. Fortunately for me he let this one go. A price was agreed, and we set about moving it to the van. The cab was surrounded by plastic balls from a children’s play area ball pit, which added to the fun of moving it. At one point I was scooping up the balls and putting them in a black bag, only to find the bag was ripped with the balls coming straight out!
Once I got the cab back I finally had that hug!
I had no idea these were produced in
I pretty much bought the cab blind, hoping it was complete inside. Fortunately it was all there and everything was in nice, unhacked original condition. It even had some minty manuals stashed away in a grubby bag at the bottom.
The aim of this restore was to clean the cab up as best I could and get it back in good working condition. I’m not adverse to a few battle scars, and I wanted to retain originality as far as possible.
Here is a list of the work I’ve done on the cab.
Marquee
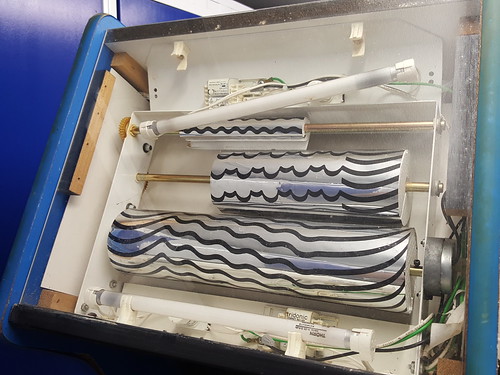
The waterfall marquee is so cool! The waterfall effect is achieved by three rollers, driven via gears by a single motor. I’ve read that these motors are commonly used in juke boxes.
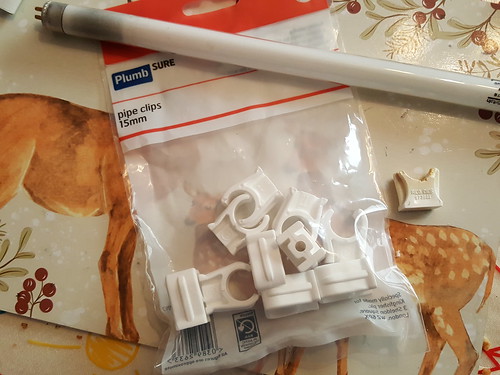
The fluorescent T15 tube retainers were brittle and had disintegrated, probably due to the heat from the tube. I managed to find some very similar ones in B&Q.
The first attempt was unsuccessful, with the tube breaking. I cut the top part very slightly to allow the tube to go in easier.
I gave the marquee compartment a good clean inside, cleaned the old grease off the gears and applied high performance silicone lubricant. I replaced the tubes and starters.
I was really surprised to find the motor still works after all these years, which is a great result!
Monitor
This was the most worrying aspect of the restore. It transpired that in a Gauntlet cab I’d bought off the Op, the monitor tube had been damaged beyond repair. Inside Toobin’ there should be a 19” medium res monitor, which would prove very difficult to replace. I was relieved when I removed the back door and everything looked as it should be. My monitor is a Wells Gardner 19K7635, utilizing a factory modified KV7000 chassis. I sent the chassis off to Grant / Gunblade for servicing, and he was able to work his magic and bring it back to life.
I gave the cardboard bezel and glass front a good clean before refitting them. The bezel is slightly distorted at the bottom, but overall is in nice condition for its age.
Control panel
The control panel was in a really bad state. It was extremely rusty, and the overlay was too far gone unfortunately.
I ended up putting a wanted post on Klov and managed to get hold of a complete one in very nice condition.
Power supply
I cleaned up the power block and wires, and replaced the original switcher power supply with a good quality modern one.
PCB and sound board
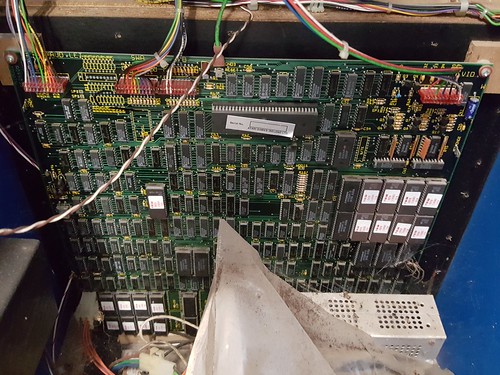
I removed the PCB and gave it a light clean with an anti-static brush, brushing off a few cobwebs and dead spiders.
It looked in remarkable condition, especially considering its age and how it had been stored for all these years. The sound board didn’t look as good however, with obvious signs of corrosion.
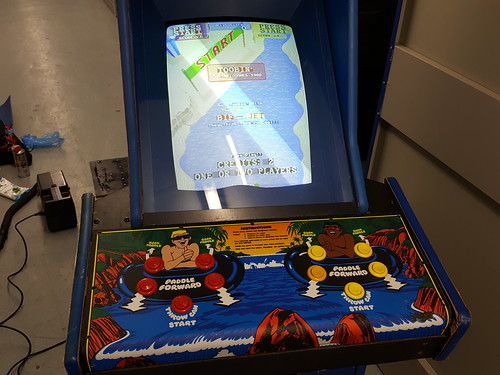
After replacing the power supply, I switched on the cab with the monitor and PCB disconnected. I was a bit startled to hear a whirring noise, but fortunately it was just the marquee rollers operating, which I‘d forgotten to disconnect! I checked the voltages and tweaked the 5V. I then switched it off, connected everything back up and fired it up. The monitor needed some adjustment, but I wasn’t expecting the board to work at all and was so pleased to see Jet and Bif paddling down the
I tweaked the 5V. After quite a bit of monitor adjustment the picture looks great, and we were able to have our first couple of credits. I can see why Atari opted for medium res. The bright, vibrant graphics really suite the tone of the game and must have helped it stand out.
The game played well, but there was just one issue – no sound. Toobin' uses an Atari A043713-24 sound board. A friend very kindly had a look at it for me and managed to repair it. This sound board type is also used with Blasteriods and Xybots.
Cab shell and artwork
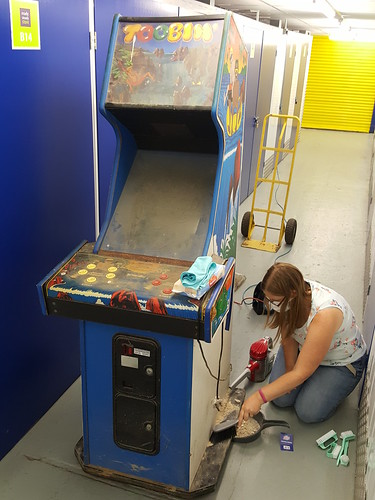
The cab has been given a good clean. Under years of filth it was in pretty nice condition. The grime was pretty dry and it cleaned up well.
The side artwork is in really nice condition overall, I’m leaving that totally original. The art strip which sits below the front of the control panel was missing. I sourced a replacement from ‘This Old Game.’
There were the remains of an old plastic ashtray which had been screwed on to the gator. I removed the screws and broken bits. It’s left a couple of screw holes, but I can live with this.
The T-moulding had popped out one side of the control panel. I refitted it with a few blobs of hot glue. I did consider replacing it, but I’m always a bit weary of putting new parts on an old cab, sometimes I think it looks out of place.
Metal work
The paint was peeling off the coin door. I took it to a local powder coater I’d used before with good results. There was a waiting time of around four weeks, which was fine as I was in no rush. After four weeks I called them, and they asked me to call back next week. This went on for a while and despite assuring me it was all in hand, it transpired they had mislaid the items! They were happy to pay for a replacement, but of course this isn’t all that straight forward. I found some similar Atari over / under coin doors for sale in the US, but they all had double coin entry slots, and the Irish Toobin’ model has one. It was the closest match I could find, but I still felt pretty down about it all. Just before I placed an order, the powder coaters called to say they had found the items! They had been placed with another order and had been painted gold. They re-done them in matt black with a textured finish, similar to the original and look great. I had to have them stock, but I do think they would have looked pretty cool on the cab in gold!
There are a lot of parts secured with black flange head bolts. I was unable to find a good match, so I ended up cleaning them up with a wire brush and respraying them. I screwed them into a wooden board and resprayed. Once they were dry, I turned them over, secured them with Blu Tack and resprayed.
The fan vent was extremely corroded. I treated IT with Hammerite rust remover gel and reprayed with chrome paint.
The grilles on the back door vent were slightly out of shape, where it looks like they’ve been attacked with a screwdriver at some point. I straightened them as best I could and resprayed it.
The monitor frame work had quite a bit of corrosion / rust patches.
I used stainless steel cleaner and a pad to clean it up, and with a bit of elbow grease most of the rust rubbed straight off.
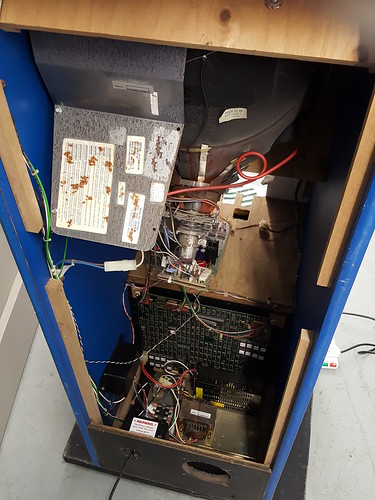
The cab cleaned and hoovered inside, with the monitor and power supply re-fitted.
Here is the cab in the games room. I’m really pleased with how it turned out. Finally I can play some Toobin’!












Mad restoration! Love to see the passion here. Great stuff.
ReplyDeleteThank you. It's taken a long time and a lot of work, but totally worth it.
Delete